Login to https://vss-portal.eis.utoronto.ca
Look for the VM to edit and click ![]()
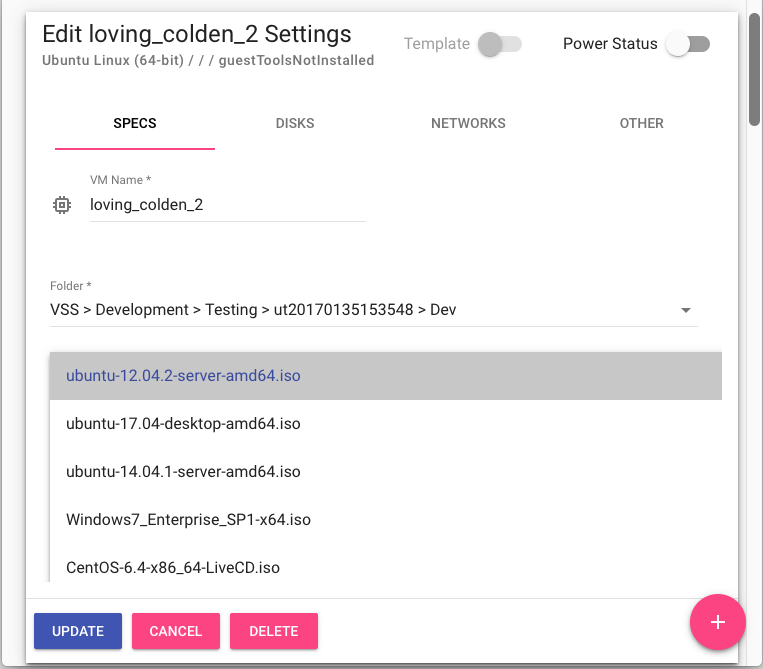
From the VM tab, click con SPECS
From the CD/DVD dropdown select the ISO image to mount

Click on SAVE.
Login to https://vss-portal.eis.utoronto.ca
Look for the VM to edit and click ![]()
From the VM tab, click con SPECS
From the CD/DVD dropdown select the ISO image to mount

Click on SAVE.
If the ISO file you need is not listed in the dropdown list, please follow the article Upload an ISO image to VSS and Load an ISO image in a Virtual Machine. |
Using https://vss-cli.eis.utoronto.ca or a local VSS CLI install
Get ISO id or name to mount:
vss-cli compute contentlib iso ls -f name=ubuntu id name library.name size -------------------------------- -------------------------------- -------------- ---------- 520d298f-8afb-476a-9244-a970e5e… ubuntu-22.04-beta-live-server-a… VSS-Nix 1464485888 837c28cf-82ef-4226-a563-7b0ac55… ubuntu-22.10-desktop-amd64 VSS-Nix 4071903232 e77d5427-0515-4351-bf2b-737b889… ubuntu-20.04.5-live-server-amd6… VSS-Nix 1406533632 21cb58c7-614c-4ea5-8328-8e6ae81… ubuntu-22.04.1-live-server-amd6… VSS-Nix 1474873344 d12541f1-d11a-43a6-9de6-86dd1fb… ubuntu-22.04.1-desktop-amd64 VSS-Nix 3826831360 |
Submit a request to mount the ISO image:
vss-cli compute vm set {VmName-or-Uuid} cd up --backing ubuntu-20.04.5 1 |
If the ISO file you need is not listed, please follow the article Upload an ISO image to VSS and Load an ISO image in a Virtual Machine. |
For more information, please refer to Manage Floppy, ISOs and OVA/OVF Images.
Related articles appear here based on the labels you select. Click to edit the macro and add or change labels.
|